Installing a raised bezel screen requires precision to avoid damage and ensure optimal visibility. Follow these steps:
Required Tools and Materials
- Raised bezel screen panel
- Precision screwdriver set
- Anti-static gloves
- Cleaning cloth and isopropyl alcohol
- Adhesive strips/mounting brackets
Installation Process
Prepare Workspace: Power down the device and place it on an anti-static mat. Ground yourself before handling electronic components.
Remove Existing Screen: Carefully unscrew the display assembly bezel. Detach any ribbon cables connecting to the motherboard using plastic spudgers.
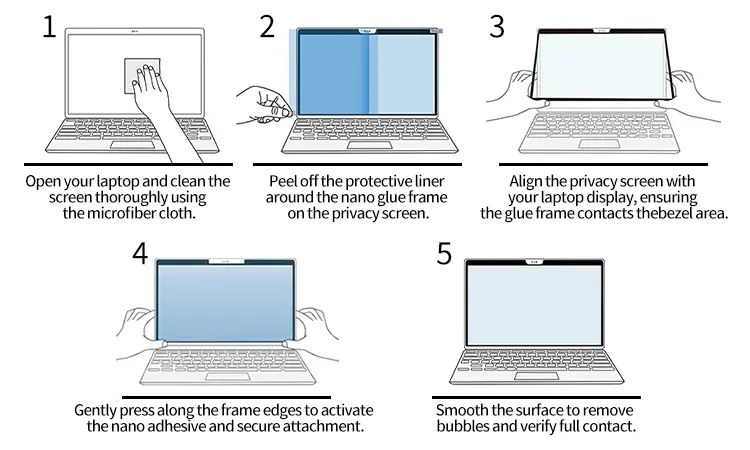
Surface Preparation: Clean the mounting area thoroughly with isopropyl alcohol. Ensure no residue or dust particles remain.
Align New Screen: Position the raised bezel screen using alignment guides. Verify perfect centering and orientation before proceeding.
Secure Display: Apply manufacturer-specified adhesive strips along the frame edges. Press firmly for 30 seconds to activate bonding.
Reconnect Components: Reattach ribbon cables to motherboard ports, ensuring zero tension on connectors. Replace screws in designated sequence.
Final Testing: Power on the device after full reassembly. Check for uniform backlighting and touch response functionality.

Critical Precautions
- Never force ribbon cable connections
- Maintain component-specific screw organization
- Allow adhesive to cure 24 hours before pressure testing
- Verify bezel elevation doesn't obstruct ventilation