Core DSP Equalizer Setup Principles
Preparation is Key:
- Ensure the DSP unit's software/firmware is updated to the latest stable version.
- Verify all audio source inputs and amplifier outputs are correctly connected to the DSP before powering on.
- Set all source levels (head units, processors feeding this DSP) and DSP input gains conservatively low initially (e.g., -10dB).
- Set DSP output gains very low or at minimum.
- Disable any built-in EQ, loudness, or bass boosts on source units.
Quick Configuration Workflow
Initial Setup:
- Enable only one measurement microphone channel input (if using). Mute all others.
- Enable only one speaker output at a time within the DSP software.
- Set main system crossovers: Use standard slopes (e.g., 24dB/Octave Linkwitz-Riley). Set preliminary points: HPF 80Hz for tweeters, 80Hz for mids (adjust later), LPF 80Hz for sub(s).
- Set time alignment distances roughly: Estimate driver physical distance from the primary listening position. Enter into DSP. Refine later.
Gain Structure:
- Play standard pink noise at 0dB reference level through the active speaker channel.
- Slowly increase the specific DSP output gain for that channel until target voltage is reached (use multimeter) or audible distortion is heard, then back off 3dB. Repeat per channel.
- Finally, increase DSP input gain if needed to achieve nominal signal level.
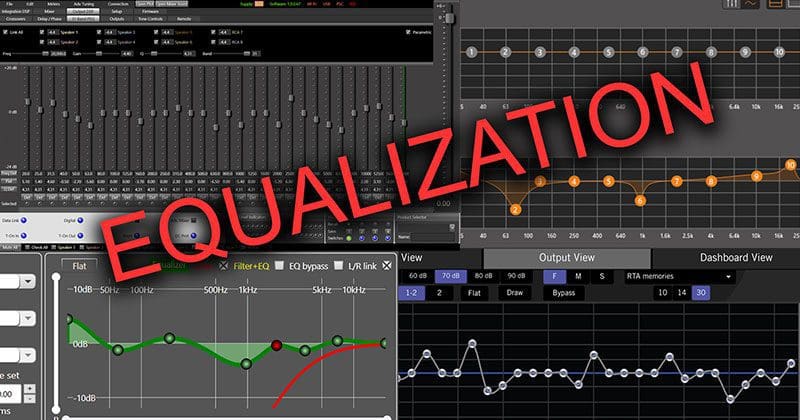
EQ Calibration:
- Always measure frequency response with RTA before applying any EQ cuts or boosts.
- Use narrow Q parametric EQ to cut large peaks. Identify the peak's center frequency and bandwidth. Apply cuts conservatively (-3dB to -6dB initially).
- Avoid boosting nulls significantly; focus first on reducing peaks to "flatten" the response.
- Widen Q for broader, gentle adjustments; narrow Q for precise peak control.
- Listen critically after each major EQ change.
Verification and Refinement
- With all channels active, perform a final RTA sweep. Compare to initial measurements.
- Listen to diverse reference tracks: Vocals, acoustic, orchestral, complex electronic.
- Pay attention to harshness (2-5kHz range), muddiness (200-500Hz), and sub-bass integration.
- Fine-tune crossover points and slopes based on measurement and listening: Focus on smooth transitions between drivers.
- Fine-tune time alignment using test tones or correlated pink noise bursts: Small adjustments (e.g., 0.02ms) can significantly improve imaging focus.
- Recheck gain staging after all EQ and processing is applied.
- Save multiple configuration presets.
Caution: Always monitor for clipping indicators at each stage (source, DSP input, DSP output). Avoid excessive boost. Make incremental changes. Protect your hearing during testing.