Essential Preparation
Ground yourself to prevent electrostatic discharge by using an anti-static wristband or touching a grounded metal surface before handling components.
- Gather tools: screwdriver, thermal paste (if not pre-applied), mounting screws, and the fan kit.
- Verify compatibility between the fan's mounting mechanism and your motherboard's socket (e.g., LGA 1700 or AM4).
- Ensure a clean workspace with adequate lighting to avoid errors.
Installation Steps
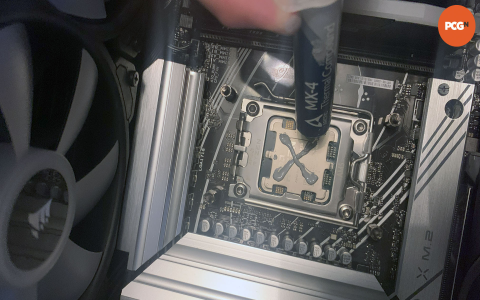
- Apply thermal paste: Place a pea-sized dot onto the CPU's center if required for heat dissipation.
- Position the fan: Align fan brackets directly over the CPU socket, ensuring no obstruction to components like RAM slots.
- Secure the fan: Use screws or clips to fasten it evenly, applying moderate pressure without over-tightening to avoid damage.
- Connect cables: Plug the fan's power connector into the motherboard's designated header (e.g., CPU_FAN or SYS_FAN for case fans).
- Double-check alignment: Confirm blades spin freely without touching any wires or heatsinks.
Testing and Troubleshooting
Power on the system and enter BIOS/UEFI to monitor fan RPM readings for proper function.
- If the fan doesn't spin, reseat the cable and check header polarity.
- Avoid excessive cable bends to maintain airflow efficiency.