Unlock VLC's audio potential by mastering its built-in equalizer. Follow these precise steps to tailor your sound.
Accessing the Equalizer
Launch VLC and play any media file. Navigate to the top menu and select Tools > Effects and Filters. Alternatively, press Ctrl+E (Windows/Linux) or Command+E (macOS) for instant access.
Enabling and Configuring Equalization
Within the Effects panel:
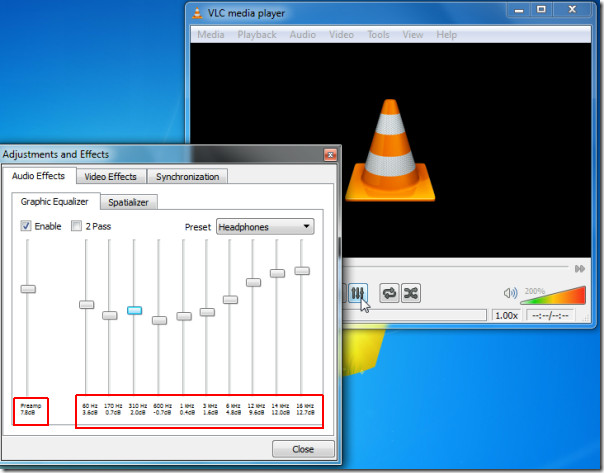
- Check the Enable box under the Equalizer section.
- Adjust frequency bands by dragging sliders:
- Low frequencies (60Hz): Boost for deeper bass (carefully to avoid distortion)
- Mid frequencies (1kHz): Modify vocal clarity
- High frequencies (12kHz): Enhance treble and brightness
- Fine-tune overall output level with the Preamp slider (crucial when boosting bands).
Applying Advanced Settings
Select an optimization preset from the Presets dropdown for quick adjustments (e.g., "Full Bass", "Vocal Enhancer"). Use these as starting points for custom tuning.
Saving Your Custom Profile
- After perfecting your settings, click the Save as preset... button.
- Name your configuration descriptively (e.g., "Rock-HighDefinition").
- Enable Automatically apply when starting VLC if desired.
Critical Best Practices
- Avoid extreme gain (>6dB) to prevent audio clipping.
- Cut frequencies instead of excessive boosting for cleaner output.
- Reset to default via Tools > Reset Preferences if adjustments cause instability.
Apply these settings while audio plays for real-time refinement. Close the window to implement changes automatically. Presets remain available across playback sessions.