Installing fans correctly on your motherboard is crucial for optimal cooling and system stability. Follow these precise steps.
Preparation
Gather necessary components:
- Case Fans: Ensure they match header types (3-pin DC, 4-pin PWM).
- Motherboard Manual: Identify fan header locations and voltage specifications.
- Philips Screwdriver: For securing fans.
- Anti-static Wrist Strap (Recommended): Prevents electrostatic discharge damage.
Installation Steps
1. Locate Headers: Consult your motherboard manual to find fan headers (CPU_FAN, SYS_FAN, CHA_FAN labels). Note 4-pin headers support PWM control; 3-pin headers provide voltage control.
2. Position Fans: Mount fans securely in your case using included screws. Ensure orientation aligns with desired airflow (intake/exhaust).
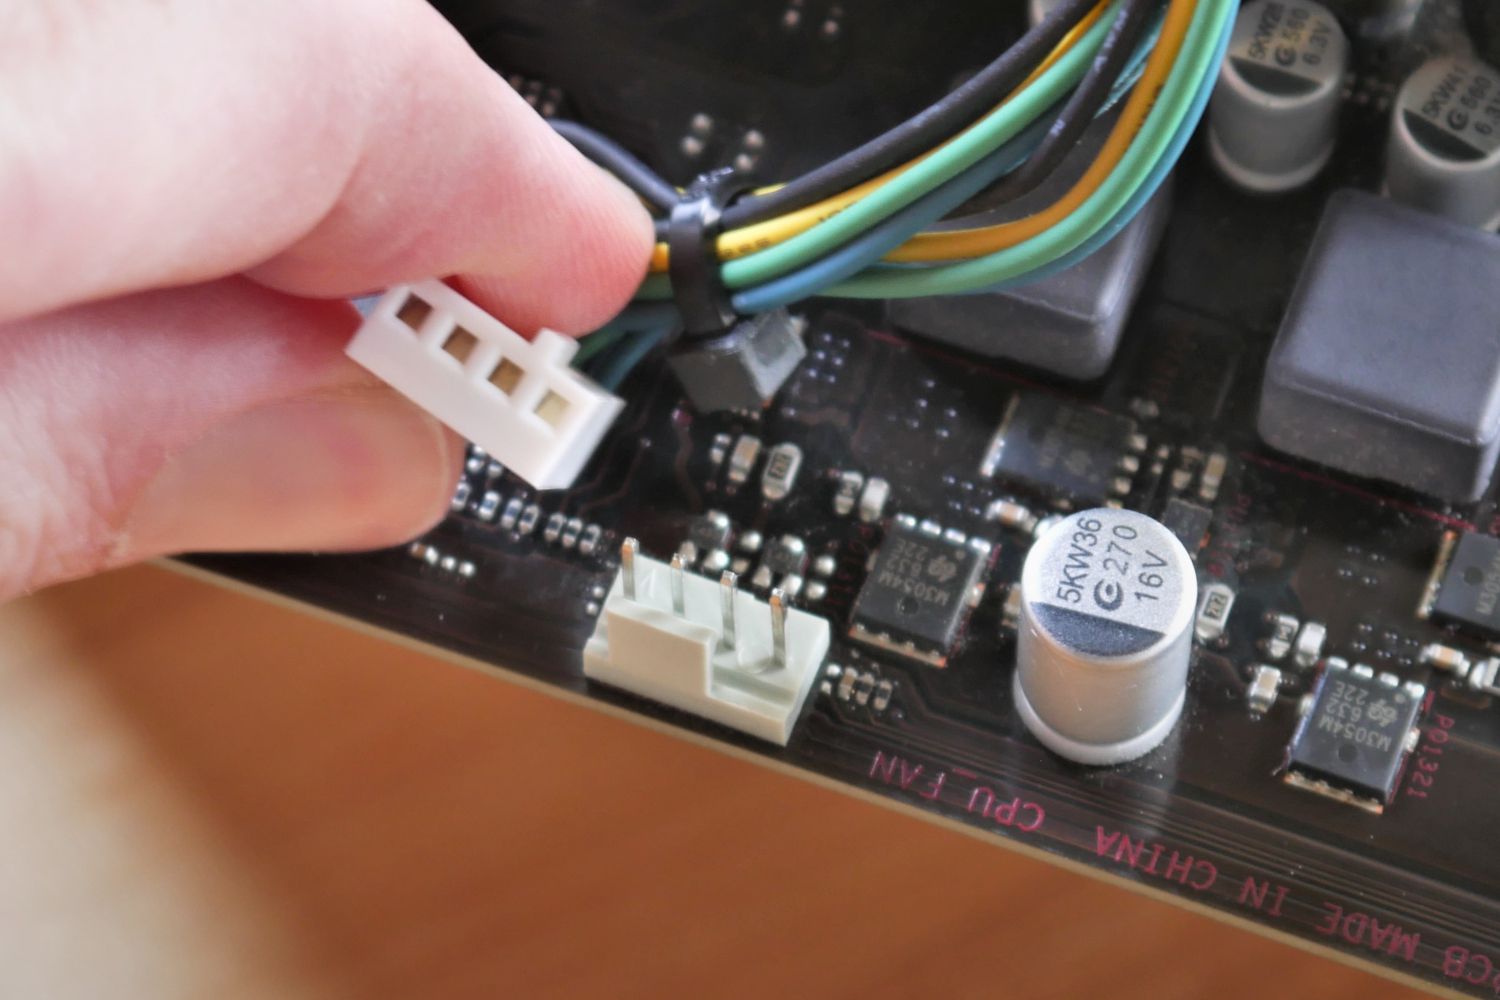
3. Connect Fans:
- Identify Connector Keying: Examine the plastic shroud on the fan cable connector. Match its grooves/slot to the header's plastic ridge.
- Align Pinouts: The connector's pins correspond to Ground (GND), +12V (Power), Sense (Tachometer), and PWM Control (4-pin only). Match pin 1 (usually GND, marked with arrow/stripe on cable) to header pin 1 (labeled/noted in manual).
- Press Firmly & Straight Down: Apply even pressure directly over the header pins until the connector seats fully. Do not force or bend pins.
4. Verify Operation: Power on the system. Enter BIOS/UEFI. Check if detected fan speeds display correctly under hardware monitoring sections. Test fan curves if adjusting controls.
Critical Considerations
- Header Capacity: Check motherboard manual for maximum current (Amps) per header (e.g., 1A, 2A). Exceeding this limit risks damage. Use splitters cautiously or directly connect high-power fans (like radiators) to the PSU via adapters.
- PWM vs. DC: PWM fans (4-pin) must connect to 4-pin headers for full control. DC fans (3-pin) work on either 3-pin or 4-pin headers. A 3-pin fan on a 4-pin header runs at constant voltage unless motherboard supports DC mode control in BIOS.
- Polarity: The keying prevents incorrect insertion. Never attempt to force misaligned connectors.
Troubleshooting
- Fan Not Spinning: Double-check connection security and header assignment. Verify sufficient power delivery. Test fan on a known-good header.
- Incorrect Speed/Control: Ensure header configuration in BIOS/UEFI (PWM mode vs. DC mode) matches the connected fan type. Verify settings save.
- Fan Not Detected: Ensure the Sense pin (pin #3) makes proper contact. Try a different fan header.
Warning: Improper installation can damage the motherboard header or fan. Disconnect AC power before handling components.