The slmgr command (Software Licensing Management Tool) is a Windows-based utility for managing software licensing and activation processes, such as verifying activation status, installing product keys, or configuring Key Management Service (KMS) settings.
How to Use slmgr: Step-by-Step Tutorial
Follow these steps to utilize slmgr effectively. Always run commands in Command Prompt as Administrator.
- Step 1: Open Command Prompt as Administrator
- Press the Windows key, type "Command Prompt", right-click it, and select "Run as administrator".
- Step 2: Understand Basic Syntax
- Type slmgr followed by an option to execute. Syntax: slmgr [option] [parameter].
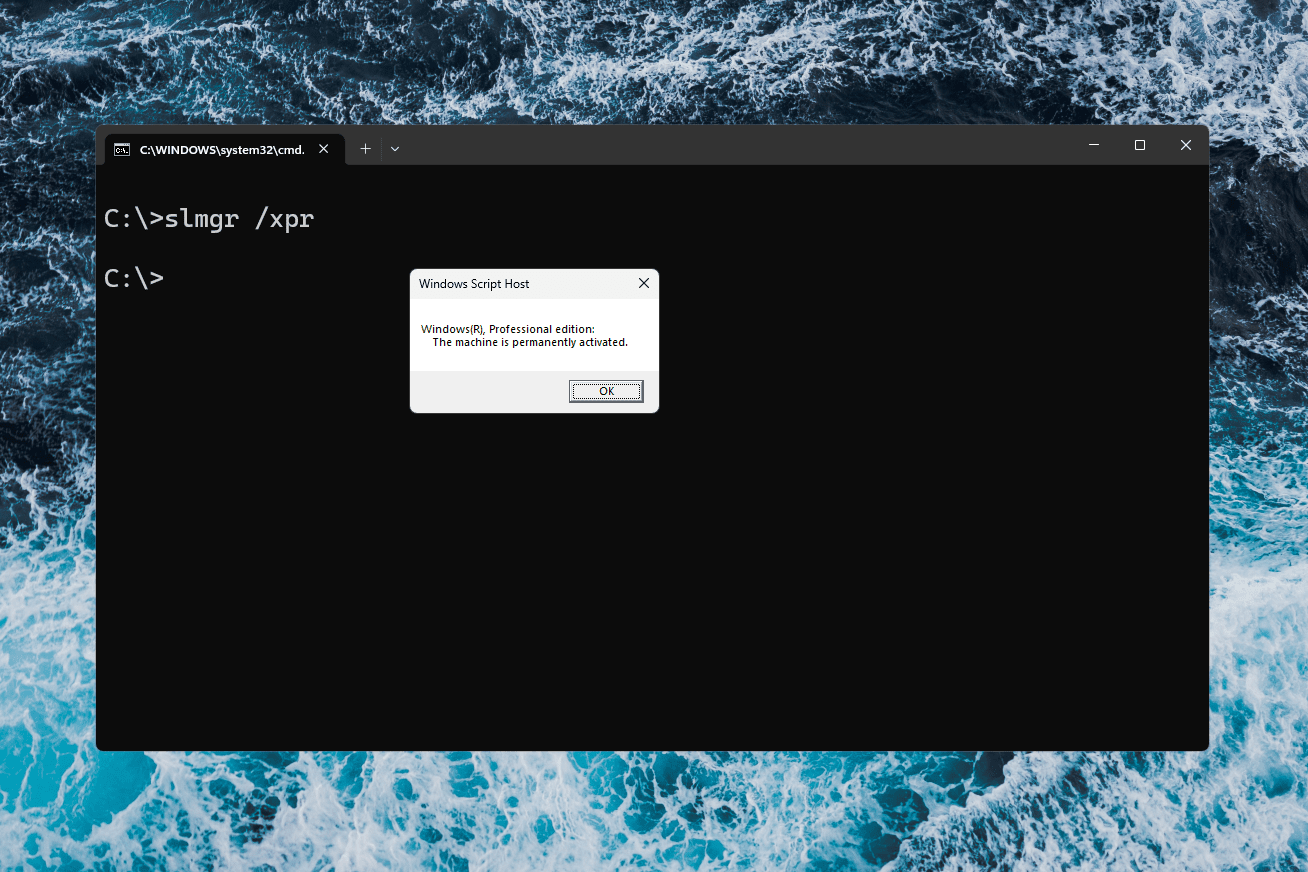
- Step 3: Check License Information
- Enter slmgr /dlv to display detailed license details, including activation status.
- Step 4: Install or Update Product Key
- To install a product key, use slmgr /ipk [product_key] (replace [product_key] with your key).
- Example: slmgr /ipk XXXXX-XXXXX-XXXXX-XXXXX-XXXXX.
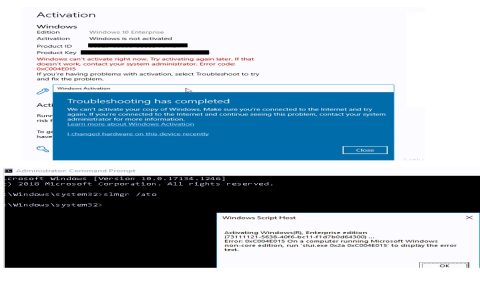
- Step 5: Activate Windows
- After installing a key, type slmgr /ato to attempt online activation.
- Step 6: Manage KMS Settings
- Set a KMS server with slmgr /skms [KMS_server_address].
- Example: slmgr /skms *.
- Step 7: Uninstall Product Key or Reset
- To remove a key, execute slmgr /upk.
- Reset licensing with slmgr /rearm if activation issues occur (requires reboot).
- Step 8: Verify Results
- Always use slmgr /dlv after changes to confirm updates.
For all options, consult slmgr /? to list available commands. Handle parameters carefully to avoid system disruptions.